Report
groups are created in Report > Setup
> More > Report Groups. Create
a new Report Group by clicking the Add button at the top right of the Report
Group list screen and you will be taken to the Report Group Information
screen. This is where you will setup
your report group.
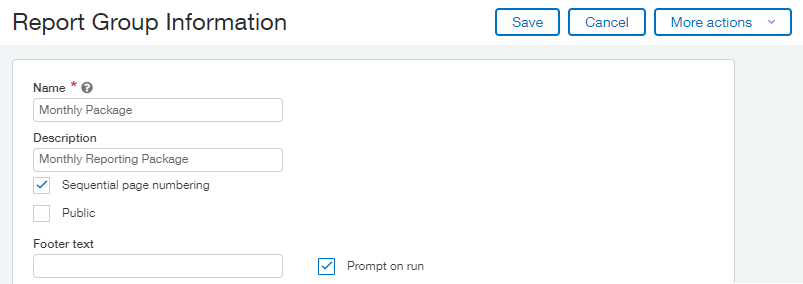
Enter a meaningful name in the Name field keeping in mind
that once this group is saved the report group name can’t be changed. This is a required field.
If the Name field isn’t enough for you to adequately describe
the report group, enter a more detailed description in the Description
field. This field is optional.
The Sequential Page Number field is where you indicate if
you’d like each new report to start their page number count at page 1 or just
continue numbering from the last page number of the prior report.
If you wish to share your report group with the rest of the
organization place a checkmark in the Public checkbox. This value can be changed at any time. It is recommended that the report group be
left as private during setup and then once you are satisfied with the group it
can be deployed the group as public.
If you would like a universal Footer across the entire report
group that can be specified in the Footer text field. This will override any footers already in the
reports within the group.
If you’d rather give the user the ability to specify a Footer
text block at run time simply place a checkmark in the Prompt on Run checkbox
and they will be asked to specify a footer on the fly.
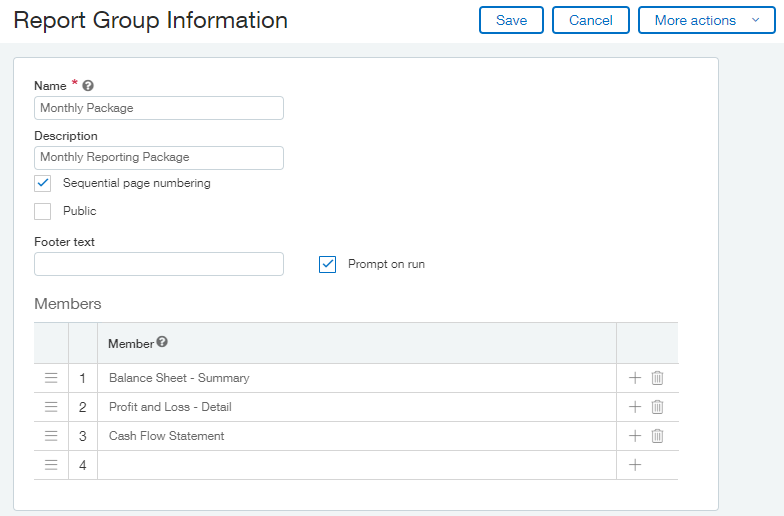
The Members portion of the Report Group Information screen is where you’ll specify the reports you wish to have included in this group. To select a report to include simply click the dropdown in the Member column for row 1 and select the report name. Repeat this step for as many members (reports) you wish to include. Please note that reports must first be memorized in order to add them to a report group. If you are not seeing a specific report on the list that you are expecting, please ensure it has been memorized. Need a refresher on how to create a memorized report? Click here! https://blackrivertechnologies.com/dashboards-memorizing-an-ap-aging-report/
When you are satisfied with your Report Group settings click Save.
Congratulations! You made your first report group! Join us next week we will learn how to run
our report group.