Do you ever find your organization needing to track more than one address for a single customer? Sage Intacct makes that easy by allowing each Customer to have different Primary contact, bill-to contact and ship-to contact information.
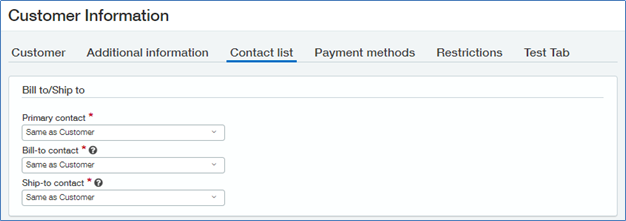
Simply navigate to Accounts Receivable > All > Customers and open the Customer record you wish to modify in Edit mode. Once the Customer record is loaded click on the Contact list tab at the top. This is where you will specify all the various addresses you wish to store and what to set them to be used with. The top section is called Bill to/Ship to and it has three dropdowns: Primary Contact, Bill-to Contact and Ship-to Contact. All of the dropdowns in the top section reference the values specified in the bottom section of the screen called ‘Contact List’.
Primary Contact: This is the main contact for the customer.
Bill-to Contact: This value is used as the Bill-to value for all customer related activities such as sales order transactions, AR invoice creation and manual deposits.
Ship-to Contact: This value is used as the Ship-To value for all customer related activities on items such as sales order transactions, AR invoice creation and tax calculations (if using Advanced or Avalara AvaTax).
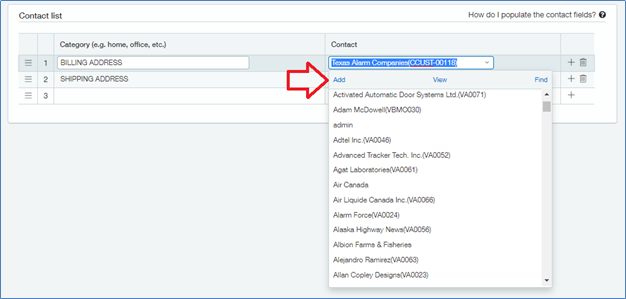
As previously stated the user maps all the addresses for the organization in the Contact list portion of the screen and assigns them different Category names. While the Category name is optional it is useful to describe what type of address you are entering. These Category names will be displayed on the dropdown list of the default addresses in the upper portion of the screen.
The Contact column on the Contact list is a dropdown which displays all of the Contact records entered in the system. These records would have been created in Company > Setup > Contacts or directly in dropdowns such as this one throughout the software. If the contact record you wish to select is already entered, simply select it from the dropdown. If a new record is required click the Add hyperlink on the upper left of the dropdown.
The Contact Information screen will appear, allowing you to create a new contact. If you aren’t able to perform these actions then there might be a permissions error. Please contact your administrator to get help adding the new contact.
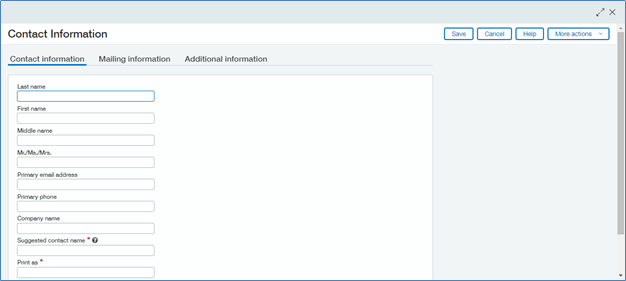
Once you are satisfied with your contact information click Save and you will be taken back to the Customer Information screen where your new contact record will be selected from the dropdown where it was created.
Once you are done setting your contact addresses, click Save to exit.
