Last week we learned how to complete the Detail tab on the Checking Account Information input form in order to create a new checking account. This week we will continue on with the creation of our new account by completing Sage Intacct Check and ACH Remittances setup steps.
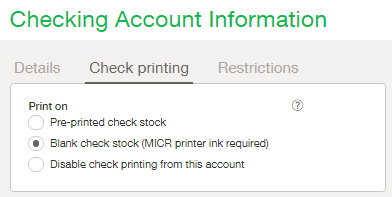
The first thing to specify on this tab is how you’ll be printing checks from this account, if you are in fact even printing checks. If no checks will be printed from this checking account, ensure that you set the radio button to ‘Disable check printing from this account’. Otherwise you will want to select the appropriate radio button based on whether you have pre-printed checks stock that just need to be filled out or if you create checks from scratch using a MICR printer.

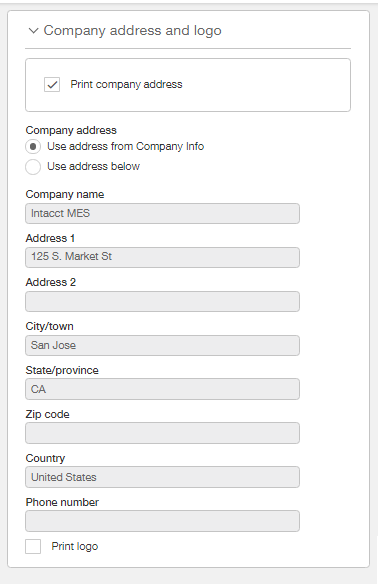
In the Company address and logo section you will specify whether or not you want to print the company address on the checks by placing a check mark, or not, in the Print company address checkbox. If you have opted to print the company address, make sure you specify which address to use, the address in the Company Information or one manually entered into this screen. Often times the bank account will have a different name or address than the main company, so it’s important to make sure this matches. If you wish to have a logo print on the check, place a checkmark in the Print Logo checkbox and upload a logo using the Upload Logo button.

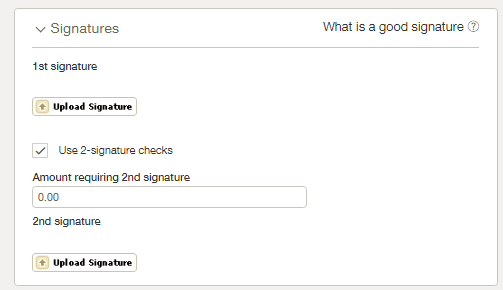
The next section will display differently whether or not you have enabled the ability to print digital signatures on checks. If you have digital check signing turned on there will be a button called Upload Signature where you can import the first signer’s signature. If you wish to have 2 signatures on the checks, place a checkmark in the Use 2-signature checks checkbox and specific what the dollar amount is that will require a second signature. If all checks require 2 signatures, enter 0.00 in the Amount requiring 2nd signature box. Before continuing with setup, ensure you upload the digital copy of the second signature.

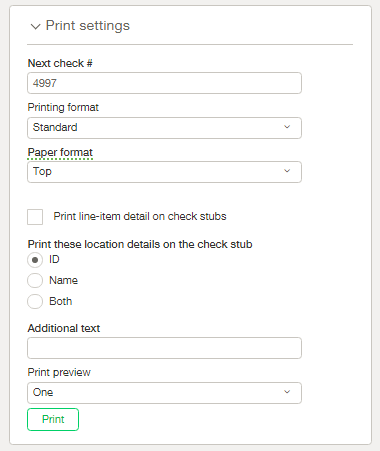
The next section of the form to be configured is the Print Settings. You will want to wait to enter the Next check # until you are ready to print your first check to ensure the numbers match. The check number field can be overridden at any time if for any reason a check needs to be skipped. The paper format field indicates where the check is on the page. If your check stock is Check/Stub/Stub, for example, you will want to set the Paper format to Top. The check printing can be previewed by clicking the Print button at the bottom of the Print settings section of the form.

If a MICR printer is being used to print checks on this account a section on this screen will be visible which is called MICR (Magnetic Ink Character Recognition). This section is used to move the MICR codes around on the check in order to have them in the perfect spot for the bank to accept. When beginning the process of setting up MICR codes it’s best to leave all these settings as they are by default. We only recommending moving the fields around if a copy of a printed check has been sent to the bank and they have asked for the fields to be moved.
If the checking account will be using ACH you will likely see an ACH setup tab at the top of the input form. This tab is where you can set up things like the ACH bank ID, Company name, Company Identification and Originating financial institution. Please note: The ACH tab is only visible for USD bank accounts.