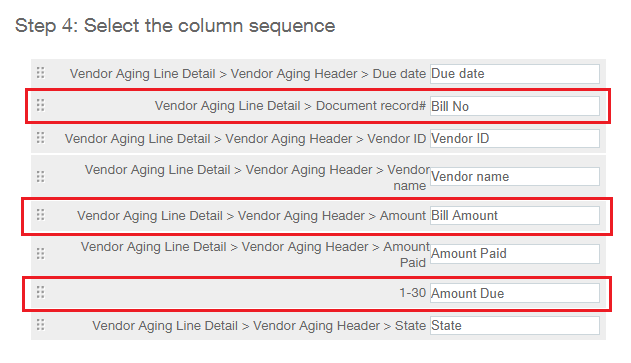
Last week we completed the first 3 steps to creating our custom reports for dashboards. Continuing on the 4th step in our report creation is to specify the column order and column names. The columns will appear in a default order but should you wish to reorganize for ease of reading, you may reorder them by dragging and dropping the rows by using the drag handles on the left side of each column name. The image below depicts the sequence we will be using for our report. Please note, we renamed the Document record# column, the Amount column and the 1-30 column. Click ‘Next’.

We will now specify which totals we want to add to our report. The totals we can set are Count, Sum, Average, Standard Deviation, Variance, Largest and Smallest. For this report we will not display any totals so we will leave the grid blank and click ‘Next’.
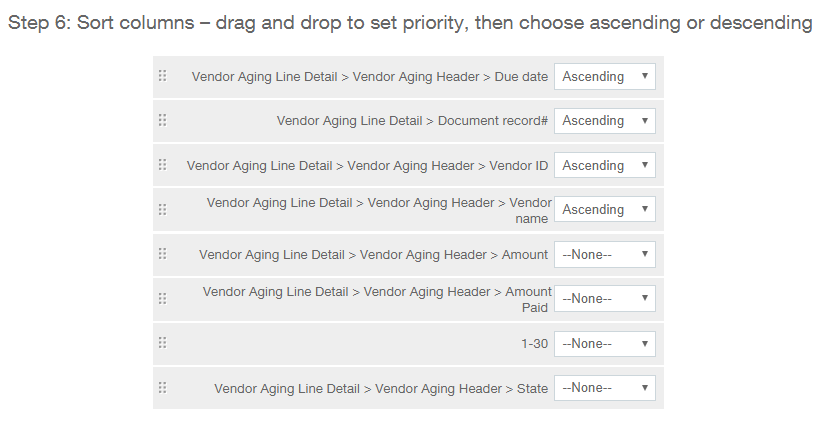
Specifying a sort order is important in order to be able to make sense of your data at a glance. The sort order priority is set by moving the column names up and down the list. This is accomplished by using the drag handles on the left side of each column. The sort order itself is set using the dropdown to specify Ascending, Descending or None. The screenshot below shows how we will be arranging our column sort order. Click ‘Next’.

On Step 7, the Filter your report scree, just leave the filters blank and click ‘Next’. Remember, you can always go back into these settings later and modify them if necessary.
Step 8 is where you can optionally group your report lines. We will leave this setting as ‘No grouping’ and click ‘Next’. If you select to group here you will be given 2 additional screens in the custom report writer for specifying these groupings.
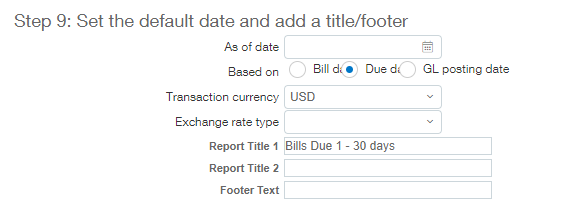
On the next screen we will leave the As Of Date blank, set the Based on to Due Date and set the currency to USD (if necessary). We will then set the Report Title 1 as ‘Bills Due 1 – 30 days’ and click ‘Next’.

For the additional prompts screen we will leave it blank and click ‘Next’.
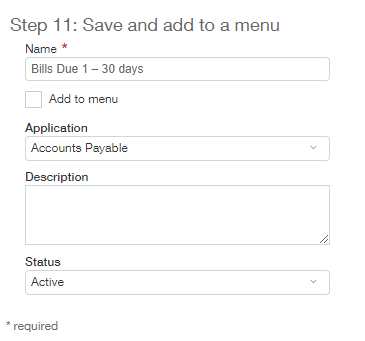
The final step on creating our custom report is to name the report. We will name our report ‘Bills Due 1 – 30 days and save it to the Accounts Payable Application. Click Save to commit your custom report to your Sage Intacct Instance.

You will be taken back to the custom report list screen where you can locate your new report and click ‘Run’ to check the output.

Join us next week when we memorize this custom report and add it to our dashboard!