
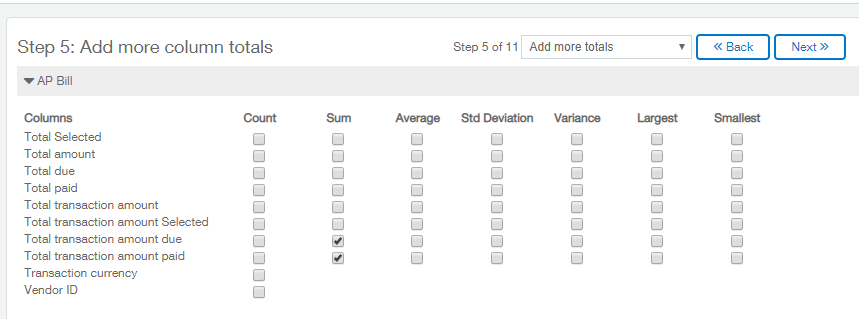
Last week we completed the first 4 steps to creating our custom report for displaying an Outstanding Payables Listing. Continuing on the 5th step in our report creation is to specify which column totals we want to add to our report. The totals we can set are Count, Sum, Average, Standard Deviation, Variance, Largest and Smallest. For our report we will only be displaying the sum of the Total Transaction Amount Due and the Total Transaction Amount Paid. This is done by placing a check-mark in the sum column for those rows then click ‘Next’.
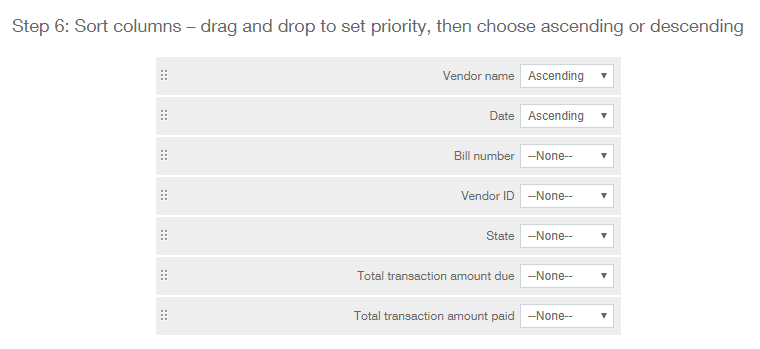
Specifying a sort order is important in order to be able to make sense of your data at a glance. The sort order priority is set by moving the column names up and down the list. This is accomplished by using the drag handles on the left side of each column. The sort order itself is set using the dropdown to specify Ascending, Descending or None. Click ‘Next’.
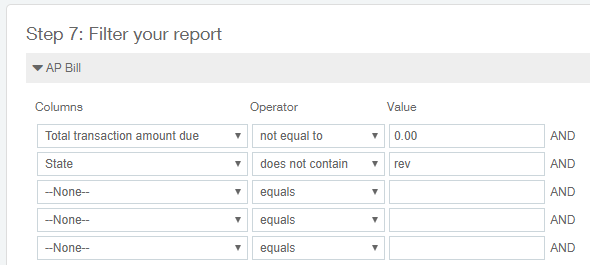
The purpose of this report is to see what bills are coming due so we will remove all zero balance bills when we filter and also remove all bills of the status reversed. Click ‘Next’ when you are done. Remember, you can always go back into these settings later and modify them if necessary.
Sometimes it becomes necessary to refine the filter to get the result you want and that is where step 8 comes in. We will leave our filter expression as the default ‘1 AND 2’ but in some instances you will want to change it. There is a link on the screen there to learn more about filter expression if you wish to utilize any advanced filtering. Click ‘Next’.

Step 9 is where you can optionally group your report lines. We would like to group our outstanding bills by Vendor Name so we will enable this setting by clicking the ‘Grouping’ radio button then clicking ‘Next’.

We will select to group by ‘Vendor Name’ and then click ‘Next’.
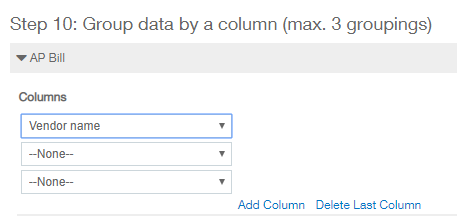
We will now select how we want the groups ordered and what sort order will be used to display the data within the group. Since we only have one group we do not need to order the group. We will select ‘Ascending’ as our group sorting and click ‘Next’.

We will set the default date as ‘Inception to Date’ and leave the ‘As of date’ blank. Make sure to click ‘Yes’ for Show Details. Click ‘Next’.
Note: If you aren’t seeing ‘Inception Date’ as an option on your Reporting Period Dropdown it may need to be activated. To do so have your administrator go to Reports > Setup > More > System Reporting Periods. More information about System Reporting Periods can be found in the February 4, 2019 blog post found here.

The ‘Define output for chart display’ screen will pop up next. We will leave this as-is and click ‘Next’.
Step 14 is the additional prompts screen which we will leave it blank and click ‘Next’.
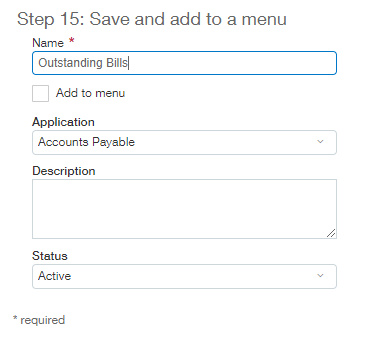
The final step on creating our custom report is to name the report. We will name our report ‘Outstanding Bills’ and save it to the Accounts Payable Application. Click Save to commit your custom report to your Sage Intacct Instance.
You will be taken back to the custom report list screen where you can locate your new report and click ‘Run’ to check the output.

This report can simply be used as is or added to a dashboard. If you wish to add this to a dashboard, join us next week when we memorize this custom report and add it!