
In order to keep up with finances it might be useful to be able to see which AP bills remain unpaid RIGHT on your dashboard. The first step to creating and Unpaid Bills Dashboard is to create a custom report. Navigate to the Report Center by clicking on Reports > All > Operational Reports > Custom Reports. It is useful to first search the existing custom reports to ensure the one you need is not already created. If it is not feel free to create a new report by clicking ‘Add’ in the top left.
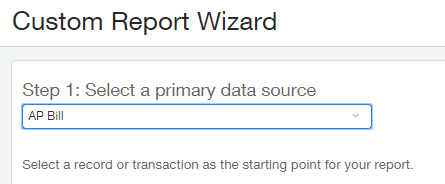
The first step to creating your custom report is to select the primary data source. In our case this will be AP Bill as shown below. Once selected click ‘Next’.
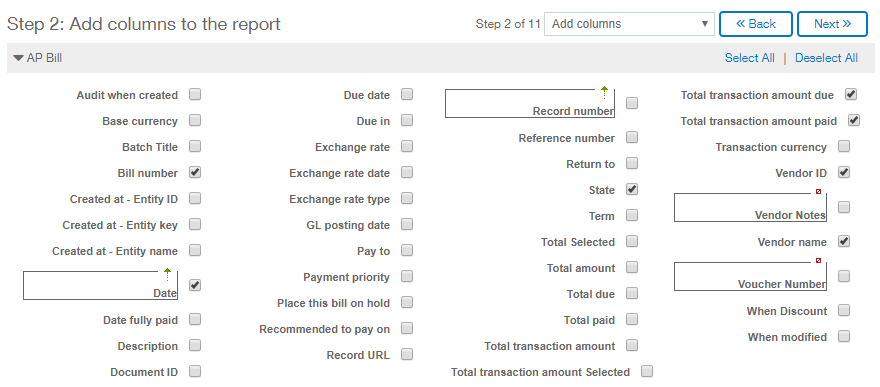
The next page is where you select the columns you wish to have displayed on your report. The choices made here can vary from business to business but for this example we will display the following AP Bill columns: Bill Number, Date, State, Total Transaction Amount Due, Total Transaction Amount Paid, Vendor ID and Vendor Name.
You may notice that below the list of available columns on the AP Bill there are several other dark banded lines which displays the tables related to the AP Bill table. You can expand any of these available column lists by clicking the arrow to the left of the header name.
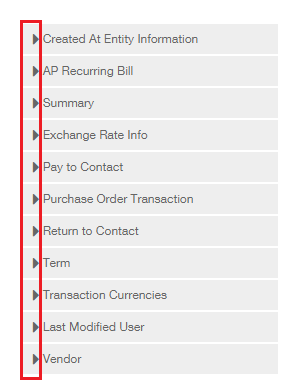
Once they are expanded feel free to select any other column names that you wish to include in your report. For this example we will stick with the columns mentioned above and click ‘Next’.
We are now given the opportunity to add a calculated column to our report. At this time we don’t wish to create on so we will simply click ‘Next’.
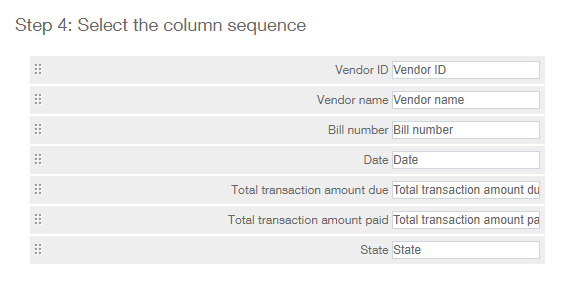
The 4th step in our report creation is to specify the column order. The columns will appear in a default order but should you wish to reorganize for ease of reading, you may drag and drop the column title bands into your preferred order. The image below depicts the sequence we will be using for our report. Click ‘Next’.
Join us next week as we continue with setting up our custom report!