During implementation you were most likely shown how to add bank accounts in your Intacct instance. As with any task that is only occasionally completed, over time we often forget the steps. Months or years later it may become necessary for you to add new bank accounts to your implementation and you may no longer remember the steps. In order to refresh your memory we will walk through the procedure today as a refresher.
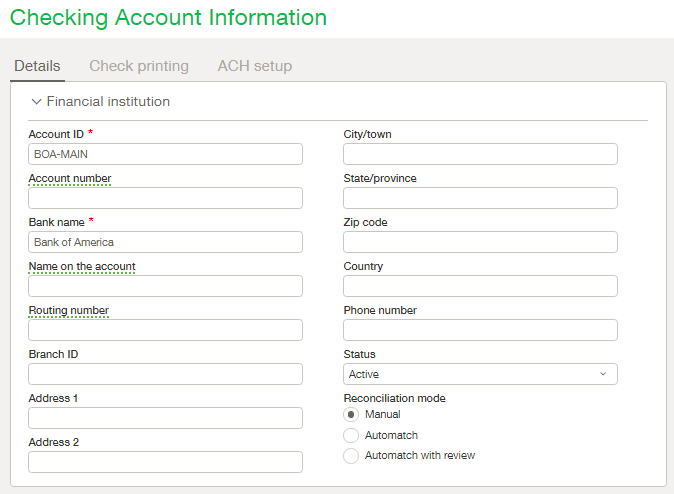
New checking accounts are added through the interface by navigating to Cash Management > Setup > Accounts > Checking > Add. The Account ID field is the first field on the Detail tab of the input form. This field is a required field. When choosing an Account ID keep in mind that once the account is saved the value cannot be changed. It is recommended that the Account ID be a shortened form of the bank name and account name concatenated together. For example if the bank is Bank of America and the account is your operating account then a good Account ID might be BOA-OPER. The goal when naming the account is to choose a name that is easily distinguishable when displayed on a list. For example, if you have an account named 0001 and another named 0002 it’s difficult to know which is the one you need to select at a glance, however if your accounts are named BOA-OPER and CITI-MAIN you will feel more confident when selecting one.
The value for the Account Number and Routing number fields can be found on a check or by logging into your online banking. Although the checking account record can be saved without these fields they are required in order to issue payments. The remainder of the fields in the upper portion of this tab are fairly self-explanatory and although it is recommended to complete as many as possible they are optional. In order to save your new bank account within Intacct the only required fields are Account ID, Bank Name and Location (depending on system settings).

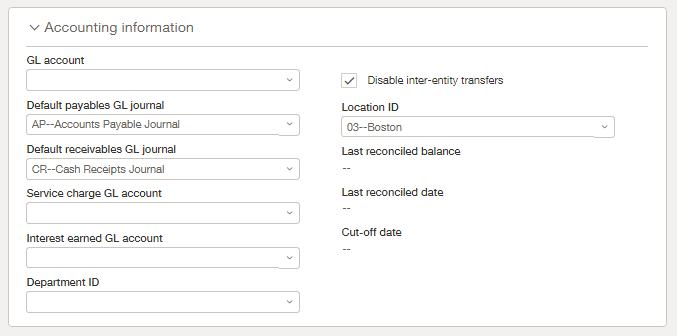
Further down the details tab you will see the section for storing the GL Accounting information related to this bank account. Using the dropdowns provided select the appropriate GL Accounts for each section. When inter-entity transactions are enabled globally you may see the option to Disable inter-entity transfers for this bank account. When this box is checked the bank account in question will not be an option when creating an inter-entity transfer.

Join us next week for the second part of the Checking account setup.