Instances may arise when you are required to get a check out quickly or while off site. In those instances a handwritten check might be the best solution. After you have written a manual check it is important to record the check in Intacct. This blog article reviews Quick Payment Processing for hand-written checks in Sage Intacct. Manual Checks are entered in Cash Management > All > Activities > Manual Payment > Add or by clicking ‘Manual check’ on the screen pictured below.

Please note: If you are in a multi-entity shared environment and wish to enter the check in a specific entity, be sure to change to that entity prior to the entry of the Manual Payment record.
As on any Intacct entry screen the required fields on the Manual Payment screen are indicated by the red asterisk beside them. First select the Payment Method from the dropdown, in our case this will be ‘Check’. Once you have selected the Payment Method use the Bank dropdown to select the bank account you wish to debit the funds from. If you are entering this check from the top level, your list of bank account numbers will be all those which are not entity private. Not seeing the account you’re looking for? Try changing to the entity to which the bank account belongs and entering the check there.

The date field on this input form will default to today’s date. If this check was written on a different date, this is where you would change the date by clicking the calendar icon to the right of the input field and selecting from the grid. You can also manually type into the Date field by clicking into the field with your mouse. From the vendor dropdown you will select the vendor to which the check was written. For those with long vendor lists the ‘Find’ functionality available on this dropdown is extremely useful. If the vendor is not already on your list you can also add the vendor here by clicking ‘Add’.

The memo field is optional but it is highly recommended that it be used to store more specific information about your check. Next you will enter the transaction amount and the check number. The Pay to, Bill number and Attachment fields in the header portion of the screen are optional.
The lower portion of the screen is where the line items are entered, these are called Entries. The Account column is where you’ll select the General Ledger Account associated with the charges you are entering. The Account Number is chosen from the dropdown and just as with the Vendor dropdown there is the functionality here to ‘Find’ a vendor by name, or add a new Vendor. Upon selection of an account number the Amount field will auto populate from the Transaction Amount entered in the header and the memo field will also copy down from the header. If you wish to spread this check out over multiple GL Accounts, feel free to add a second and subsequent line item entries below the first one. If you are entering this transaction in the top level of a multi-entity shared environment you can also spread the charges out over different entities.

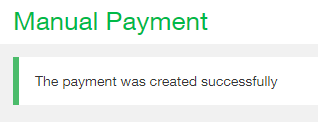
Once you are satisfied with your Manual Check entry and have reviewed the information entered, click ‘Save & Confirm’ to commit the check. Intacct will indicate to you that the check has been saved by taking you back to a blank Manual Payment entry screen with a success message displayed at the top.

